HOUDINI - PYRO SIMULATION BASICS
INTRODUCTION
Pyro simulation is the simulation of volumes (just like flip simulation involves the simulation of particles). Volumes could be smoke, fire, dust, gas, etc.
Two key attributes affects the behaviour of pyro simulations namely: Density and Temperature. Of course there are other attributes such as velocity, convergency, color etc. But for most cases, density and temperature are what makes pyro simulation possible.
Density determines the physical appearance and mass of the volumes (smoke, fire etc.), while Temperature is responsible for the rising of the volumes. If there is no density, there will not be any volumes. However, if there is no temperature, we will still see the volumes, but they will not rise; they will only rise when we introduce temperature.
BASIC SMOKE EMISSION SETUP IN HOUDINI
We are going to do a basic setup for smoke simulation. We will do this setup solely in the SOP level.
Let us begin by creating an empty geometry node and rename it "smoke simulation".
Double click to enter this node's SOP level. The SOP level is currently empty, so first, we need to create an emitter geometry from which the smoke will emit from.
It is important to remember that the shape of the emitter geometry will also contribute to the shape of the smoke simulation. If we want, we can import our own custom geometry as either FBX or alembic (that has been unpacked) and use as the smoke emitter.
We will use a simple sphere for this case, so let us create a sphere polygon, rename it as "emitter geo" and increase it's subdivisions.

Now, just like we highlighted in flip simulation module, we need points generated on (or within) the emitter geometry to serve as the source of the smoke volumes. There are several ways we can do this, but to keep things simple, we will use a pyro source node to do this for us automatically. This node automatically converts our geometry into points, and we can choose whether the points should appear on or inside the geometry. We will have something like below once we do this:

We will do the following settings on the pyro source node:
- Under initialize, choose 'source smoke', this will create the density and temperature attributes for us;
- Change the Mode to 'volume scatter' to generate points within the geometry;

If we need to add more attributes later such as velocity or convergence, we can do that by clicking the '+' sign next to the 'Attributes' tag, but for now, we will keep things simple.
Next, we need to convert these points into volumes by connecting a 'volume rasterize attributes' (VRA for short) node. Just like the name suggests, it will convert the points into volumes based on their attributes.

We will notice that the points disappear from the viewport. This happens because we have not yet defined what attributes to rasterize. So in the dropdown next to attributes on the node, we will choose all the attributes we want to rasterize. For this case, we will choose both 'density' and 'temperature'. We can also turn on 'Normalize by clamped coverage' to make the volume match the emitter geometry in shape. The volume should now appear:

NOTE: Whenever we add new attributes to our pyro source, remember to add them to the VRA attributes so that the attributes is taken into consideration during the simulation.
Finally, let us add a pyro solver node which will help to drive the simulation.

If we playback now, we should see the smoke rising up. The simulation works! This is the most basic setup for our pyro simulation. We will build upon this basic setup from here on.
Right now, the emission is looking too uniform, so we can drop either an attribute noise node or an attribute adjust float node to add some noise into the simulation. Let us use the attribute adjust float which is better. In the Attribute Name dropdown, we can choose what attribute we wish for the noise to affect. In this case, let us choose 'density'. We can also create a new attribute adjust node to affect 'temperature'.

Let us do the following settings on the Attribute Adjust Float node to get some nice results:
- Change the operation to 'Multiply';
- Change pattern type to 'Noise';
- Change range values to 'Min/Max' and set a desired minimum and maximum noise values;
- Adjust Noise Pattern 'Element Size' to get a desired result;
- Enable 'Animate Noise' under the animation tab.
Playback the simulation again, we should see that the smoke is now broken up due to the noise we added.

For the sake of consistency, let us use relative referencing to link the voxel size of the pyro solver to the VRA voxel size and the pyro source particle separation (when we use volume scatter).
TWEAKING THE SMOKE'S BEHAVIOUR AND LOOK
We are going to explore the various ways we can tweak the look of the smoke to get different results and looks for the smoke simulation. Let us start by selecting the pyro solver node and go through each tabs and settings:
1. SETUP
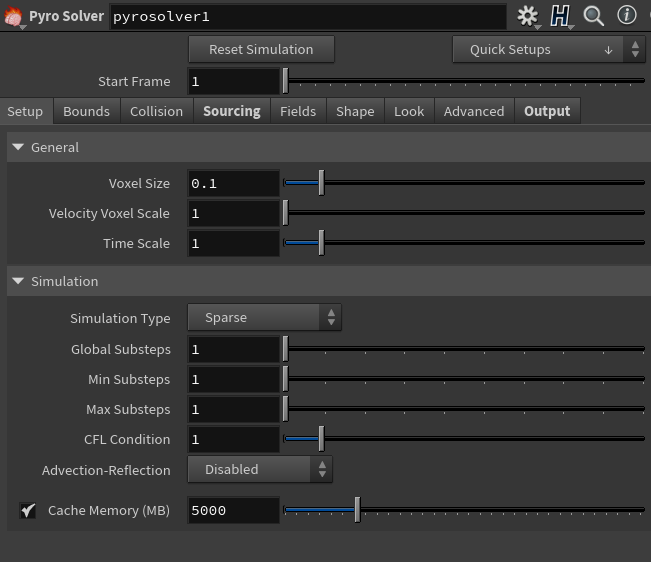
- We can increase or decrease the resolution of the smoke simulation via the 'voxel size'.
- If we have a fast moving smoke simulation, we can avoid artefacts and maintain the smoke details by increasing the 'max substeps'.
- If we need more memories to cache the smoke simulation, we can crank up the cache memory limits.
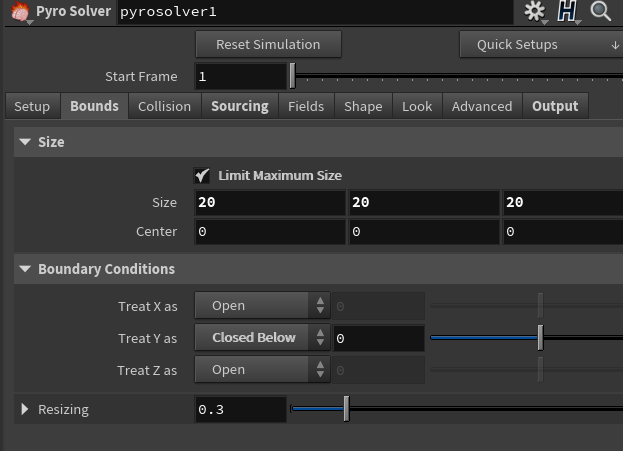
2. BOUNDS
- By default, the bounding box automatically grows to accommodate the pyro simulation. If we want to limit the bounding box to a certain size, simply turn on the 'Limit Maximum Size' and set the size and position to our needs. When we play the simulation, the bounding box will not grow beyond the set limit.
- We can change the 'boundary conditions' to cut off the pyro simulation in any specified axis. For example, if we choose 'Treat Y as' and change it to 'Closed Below', that means any pyro volume below Y axis where the emitter is would be cut off.

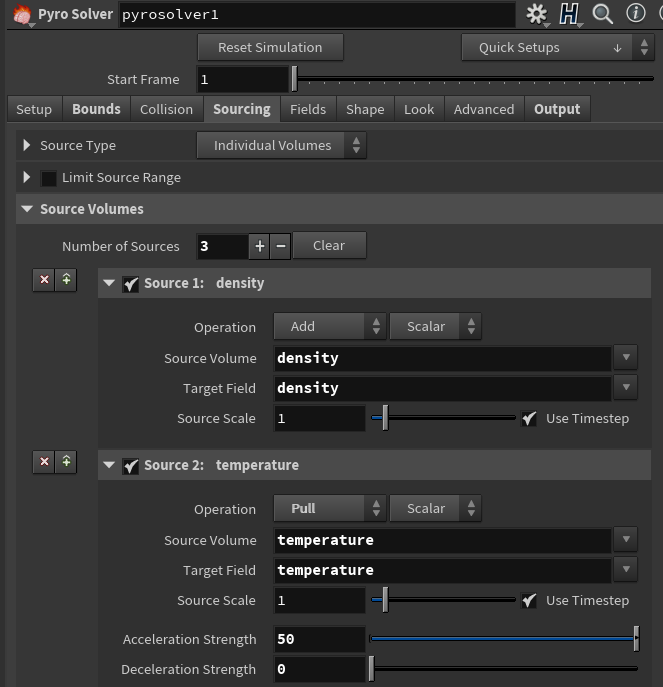
3. SOURCING
This is one of the most important tabs on the pyro solver. We can increase the effect of each attributes we added to the pyro source in this tab. In the source volumes;
- If we set the source scale value of the density source to a higher value, it is going to increase the amount of the smoke emitter. If we set it to 0, we will not see any smoke.
- If we increase the temperature source scale to a higher value, it will make the smoke rise faster. If we set it to 0, we will see the smoke, but it will not rise. We can also adjust the acceleration strength of the temperature to determine how fast from rest the smoke rises.
- We can also animate these source scale values to create different kinds of effects and results. Later on when we treat explosion effects, we will see how this works.
4. FIELDS:
- Dissipation is the lifespan of the smoke volumes. If we set it to a higher amount, the smoke will disappear quickly, and if we set it to a lower amount, it will live longer.
- We will explore the other settings here later on.

5. SHAPE
We can really start shaping our smoke simulation with the settings on this tab.
- Buoyancy is the tendency of the smoke to rise. The default value of 1 works just fine. If we set it to a higher value, the smoke will become really light and rise even more. If we set it to a value lesser than 1, it starts getting dense. If we set it to a negative value, say -1, the smoke will become really dense and will fall downwards instead. We can use this to create a cryogenic look for our smoke.


- Wind: we can use wind to add directionality to our smoke simulation. If we enable the wind parameter and set a magnitude and a direction, the wind will affect our smoke and make it move in the specified direction.


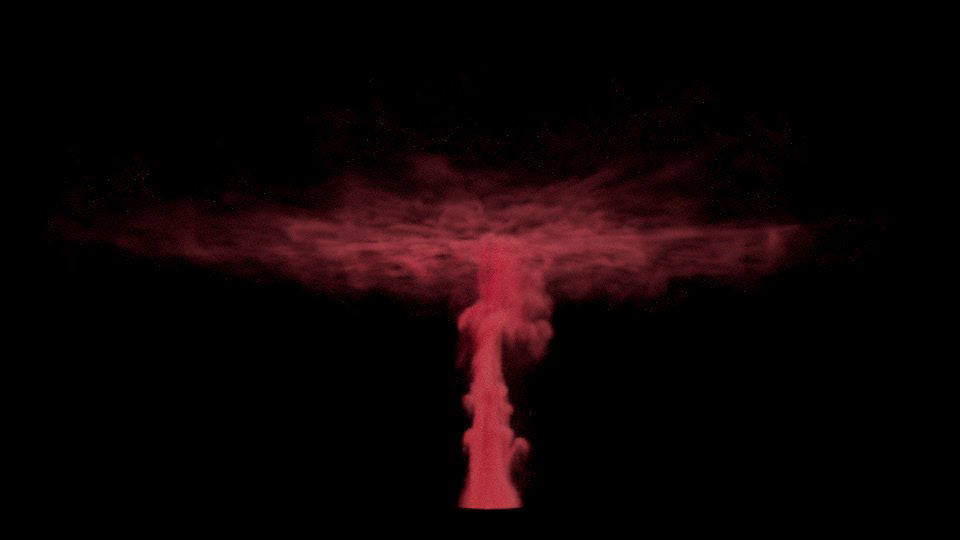
- Disturbance is going to add a lot of details to the smoke. We can use this to breakup the uniformity of the smoke. We can get different looks by tweaking the base block size. If we increase it, we get the result below:
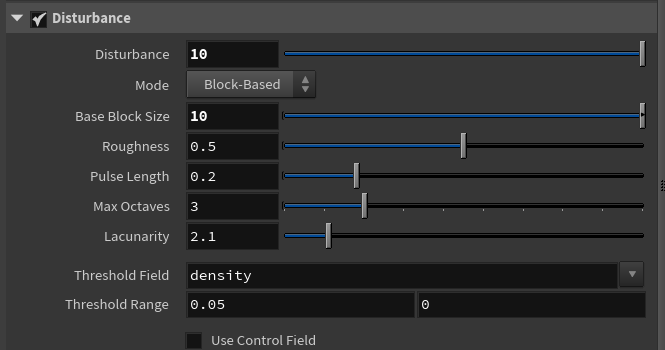

If we decrease the base block size, we get a wispy look for the smoke.


Feel free to play around with all the settings here to get different looks.
- Turbulence will add even more noise and really break apart the shape of the smoke. Play around with the different settings to get different results.

- Shredding and Flame Expansion works with fire/flames. We will look at those when we simulate fire and explosions.

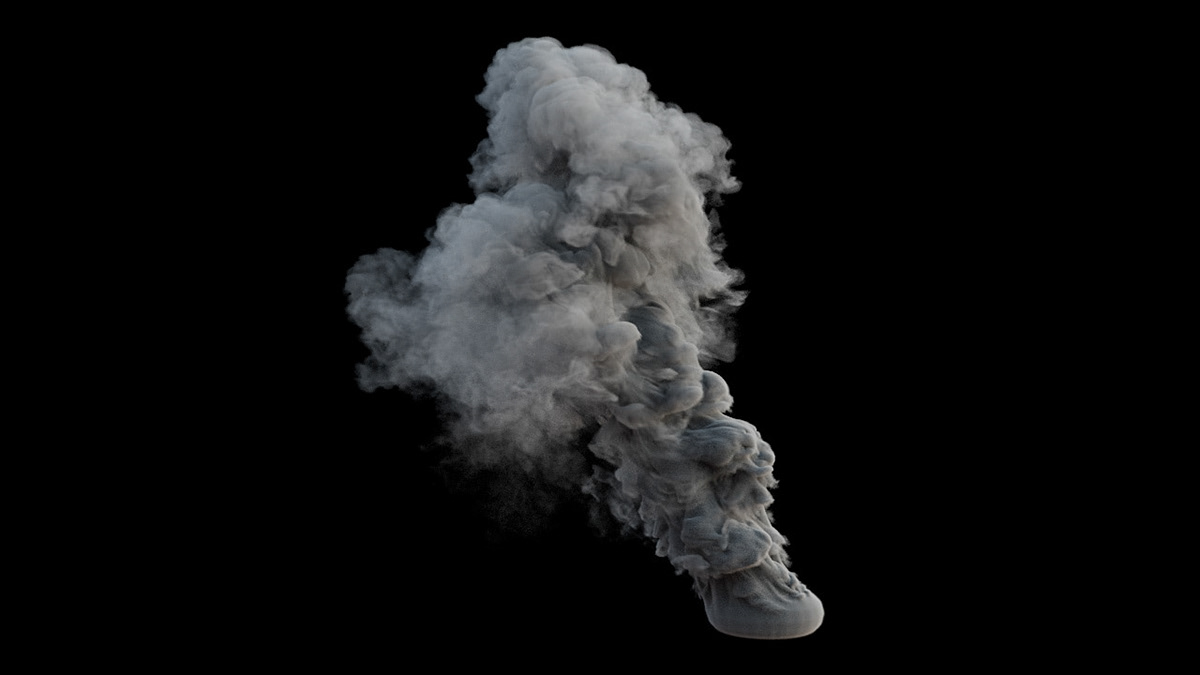
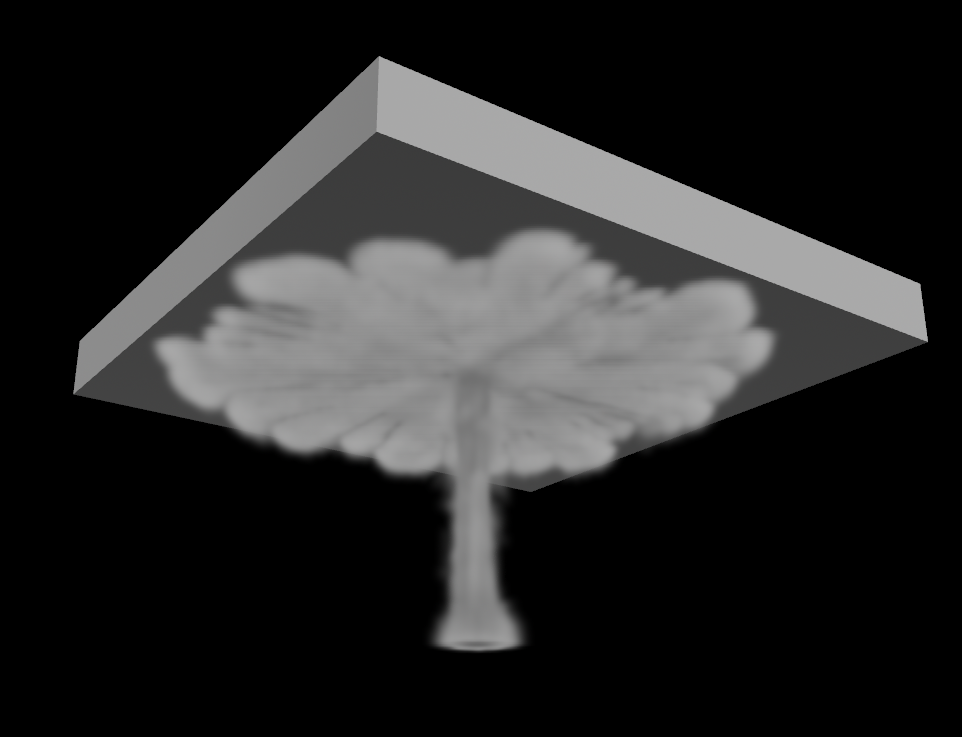
For our example here, we tweaked all these various settings and achieved the smoke look below:

AUTOMATING THE SMOKE DENSITY
As mentioned earlier, we can switch ON and OFF the smoke by animating the density source scale value on the pyro solver from 1 to 0 over time.
Another way we can do this is by using an attribute wrangle node. An attribute wrangle node has so many uses in Houdini. We can use it to create different attributes and automate them with the Houdini VEX Expression, or VEXpression for short.
Let us add an attribute wrangle node before the VRA node:

In the VEXpression tab of the attribute wrangle, let us create a new parameter to switch ON and OFF the density of our smoke as follows:
f@density *= ch("switch");
f@density *= ch("switch");
Then click on the '+' icon next to the VEXpression field to create the attribute. It is currently set to 0. At this value, no smoke is emitter because the 'f@density' flag directly ties to the density source scale value of our pyro solver. So, we can set it to 1 and animate it to 0 over time. We will get the exact same result like we have in the video above.

ADDING COLLIDERS
Let us now add a collider to our smoke simulation.
Start by creating the collider geometry. In this case, let us create a box, scale it up and position it above the smoke emitter.
We will also create a collision source node, and connect our box to it's input. Like every other simulations in Houdini, we need the VDBs of collider geometries to collide with our simulations. We will connect a null output to the VDB output of the collision source, which we will in turn feed into the pyro solver collision input. Our connection should look like below:

NOTE: If we have more than one collider, we have to create a collision source for each of them and use a merge node to connect their VDB outputs to the pyro solver collision input.
If we play the simulation now, the smoke should collide with the box.
Lastly, we can add a volume visualization node to help us to a basic look development for the simulation. Note that this will not affect our smoke simulation in any way, it is just a preview tool for us.


CACHING PYRO SIMULATIONS AND VDB EXPORT
1. CACHING:
Since we are creating our pyro simulation in the SOP level here, we can simply cache it out directly from here.
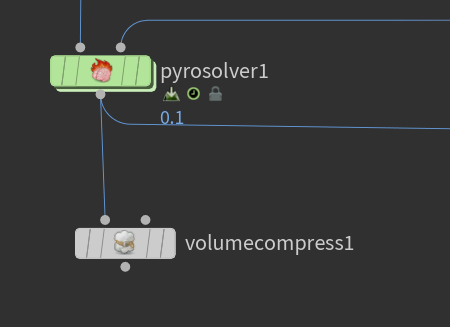
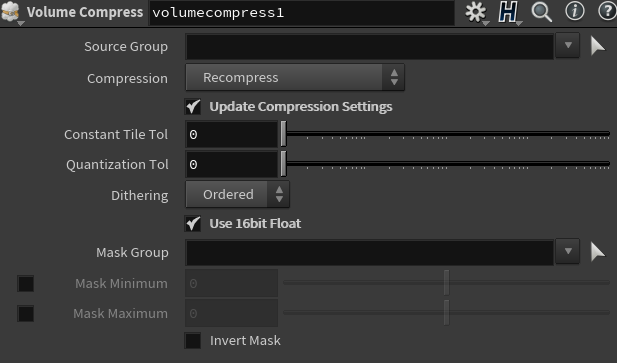
Let's first create a volume compress node to help us compress the size of the final simulation and connect it to the pyro solver:
Do the following settings on the node:
Next, let us connect a file cache node, specify an output directory, and cache out the simulation firstly as a ".bgeo.sc" file which is Houdini's native format for caching simulations. Ensure to follow the usual naming convention:
"FileName_$F4.bgeo.sc"
"FileName_$F4.bgeo.sc"

2. VDB EXPORT:
Now let us export as VDB.
Create a convert vdb node and connect it to the output of the file cache from above. Under the group dropdown, choose all the attributes we created for our pyro simulation, and also change the 'convert to' to 'VDB'.
Create a convert vdb node and connect it to the output of the file cache from above. Under the group dropdown, choose all the attributes we created for our pyro simulation, and also change the 'convert to' to 'VDB'.

Finally, connect another file cache node, specify the output directory, and in the naming, use the ".vdb" extension, that is:
"FileName_$F4.vdb"
Click save to disk. This will now export our smoke simulation as VDB files, and we can import them into a third-party software like Maya, blender, or Unreal Engine.

Below is a viewport and render preview of the vdb of the smoke simulation inside Maya: